• Find My Drone

How to Land a Drone: Every Landing Situation Explained

Updated

By Paul Posea

How to Land a Drone: Every Landing Situation Explained - drone reviews and comparison

How to Land a Drone Manually

2-3 ftHover height before final descent
6 inCut throttle this high off the ground
3 secWait before powering off motors

The Standard Manual Landing Sequence

Manual landing is a four-step process: find your spot, slow your descent, hover briefly at low altitude, then cut throttle. The sequence sounds obvious, but the mistake most new pilots make is throttling down continuously all the way to the ground, which lets the drone drift and wobble on the way down.

  1. Position the drone directly above your landing zone at a controllable altitude.
  2. Reduce throttle gradually to begin a slow descent. Keep it under 0.5 m/s if your app shows descent speed.
  3. At 2-3 feet off the ground, hover momentarily. This gives you a final check: surface is clear, no crosswind drift, drone is stable.
  4. Lower to 6 inches off the ground, then cut throttle. The drone drops the last few inches onto its landing legs.

Cutting throttle at 6 inches rather than flying all the way down prevents the ground effect turbulence from destabilizing the drone at the last moment. The motors stop spinning as the frame settles, not while it's still airborne.

Ground Effect and Why It Matters

Ground effect is the aerodynamic cushion created when rotor wash reflects off a surface and back into the propellers. It makes the drone feel floaty and less responsive below about one rotor diameter from the ground. For a DJI Mini 4 Pro, that's roughly 2-3 feet.

Inside ground effect, the drone generates more lift than expected and can drift laterally in response to very small control inputs. This is why hovering at 2-3 feet briefly before committing to final descent gives you time to correct any drift before you're at 2 inches with no margin.

Drone manual landing technique
Controlled descent with a brief hover at 2-3 feet before final touchdown

Landing on Different Surfaces

Flat, hard surfaces (asphalt, concrete, packed dirt) are the easiest. Grass is fine for most drones but can hide rocks and uneven patches. Avoid landing on loose gravel, sand, or dusty surfaces: the rotor wash kicks up debris that can damage motors and scratch the camera gimbal. A landing pad solves this on any surface.

Tip: Keep a foldable landing pad in your bag. The PGYTECH O-Ring pad takes 5 seconds to set up and eliminates most surface-related landing problems.

How to Hand-Catch a Drone

When Hand-Catching Makes Sense

Hand-catching is the right call when you can't land safely: you're standing on a boat, a rocky hillside, a snow-covered slope, or anywhere a conventional landing would damage or lose the drone. It's also the correct technique when flying from or returning to a moving platform.

Done correctly, hand-catching is safe and repeatable. Done incorrectly, it's one of the fastest ways to slice open your hand. The difference is in the technique, not the courage.

Disabling Downward Sensors Before You Catch

Most modern DJI drones use downward vision sensors to maintain altitude above surfaces. If you reach up to catch a drone with these sensors active, the drone detects your hand as a surface and climbs to avoid it. You end up chasing a drone that keeps flying away from you.

Before attempting a hand-catch on any DJI drone with active obstacle avoidance:

  • Go to Safety settings in DJI Fly and disable downward vision sensors temporarily.
  • Alternatively, switch to manual/ATTI mode if your drone supports it (most Mini series drones don't).
  • Some pilots cover the downward sensors with their thumb briefly during approach to trigger the manual override.
Warning: Never attempt to grab the body of the drone. The props are spinning. Grab from below the body or from the legs. Approach from behind the drone so the camera faces away from your hand.

The DJI Neo and Auto-Landing in Your Palm

The DJI Neo is designed for palm takeoffs and landings. When you extend your palm flat under the drone while in hover mode, the Neo's downward sensors recognize the shape as a landing surface and descend automatically onto your hand. This is a deliberate product feature, not a workaround.

For all other DJI drones, the hand-catch requires manually flying the drone to a stable hover at approximately chest height (5-6 feet), then slowly reaching up from underneath and closing your hand around the body from below. Cut the throttle once you have a firm grip, and let the motors spin down before moving the drone.

Drone Return to Home landing sequence
RTH precision landing uses the downward camera to match the takeoff GPS position

Return to Home and Precision Landing

How Automatic RTH Landing Works

Return to Home (RTH) is triggered three ways: you press the RTH button, signal is lost, or battery drops to a critical level (typically 10-15%). The drone climbs to its preset RTH altitude, flies back to the recorded home point, and descends to land.

The landing accuracy of basic RTH is GPS-level: usually within 2-5 meters of the takeoff spot. That's good enough in an open field, but not good enough if you took off from a narrow boat deck or a specific marked point.

How Precision Landing Improves Accuracy

Precision landing uses the downward camera to recognize the takeoff location visually. When the drone descends to within about 5 meters of the home point, it switches from GPS to visual positioning and matches specific visual features on the ground to land within centimeters of the original spot.

Precision landing works best when the surface is visually distinctive: a landing pad with a pattern, a specific piece of gear, or patterned pavement. It works poorly on uniform surfaces like blank concrete or grass. If the drone can't visually confirm the home point, it falls back to GPS accuracy and lands nearby.

Note: Precision landing only activates if the drone took off from the same location. If you moved the home point mid-flight, precision landing will target the new home point, not the physical takeoff spot.

RTH Altitude Setting

Set your RTH altitude before every flight in DJI Fly's Safety menu. The altitude should be higher than the tallest obstacle between your current position and home. In an open park, 30 meters is usually enough. In an urban area with buildings, set it to 100 meters or higher. If you're flying in a canyon or below a cliff edge, RTH may not be safe at all: a manual return is better.

Landing a Drone in Difficult Conditions

Landing in Wind

Wind is the most common cause of hard landings. A 15 mph crosswind that you barely noticed at 100 feet becomes a significant control challenge at 2 feet with the ground effect adding turbulence underneath.

The technique for wind landings:

  1. Point the drone into the wind, not sideways to it. A headwind gives you control authority; a crosswind fights it.
  2. Increase your descent speed slightly so you spend less time in the unstable zone near the ground.
  3. Cut throttle from 6 inches up, just like a calm-day landing. Don't try to "fly it onto the ground" gently in wind: you'll lose more control on the way down than you'd gain.
Tip: If wind is strong enough that the drone is fighting to hold position during your descent, use auto-land if available. The drone's flight controller handles small corrections faster than your thumbs can.

Uneven Terrain

Landing on a slope or uneven ground risks tipping a drone onto its side immediately after touchdown. The props are still spinning at that point, and a tip can result in a prop strike against the ground or your hand.

Options on uneven terrain: use a landing pad to create a flat surface, hand-catch as described above, or use your hand to hold the drone stable by gripping the body from below while the throttle cuts. If none of these work, find a flat spot even if it means walking 30 seconds.

Vortex Ring State: The Other Descent Danger

Vortex ring state (settling with power) happens when you descend faster than roughly 300-500 ft/min while under power. The drone sinks into its own rotor wash, the propellers start recirculating turbulent air, and lift drops rapidly. It's distinct from ground effect and can happen at any altitude.

The signs: the drone descends faster than expected, feels mushy, and won't respond normally to throttle-up. Recovery: add forward or sideways stick to fly out of the downwash column. Continuing to climb straight up makes it worse. Most consumer drones won't hit this under normal flying, but aggressive straight-down descents are the most common trigger.

Tip: If your drone is descending faster than expected and not responding to throttle, add forward stick to escape the downwash column before adding more throttle.

Low Battery Emergency Landing

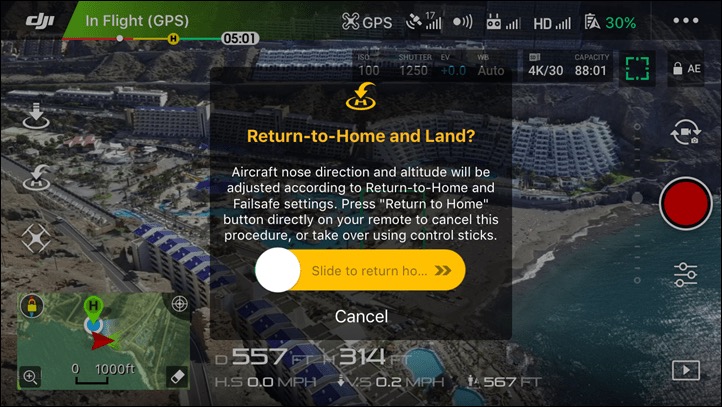
DJI drones issue the first low-battery warning at around 20-25% remaining. Start returning then. Not at the second warning. Most pilots who lose drones to battery exhaustion ignored the first alert and kept flying.

At 10-15%, DJI begins a forced auto-land. You can override briefly by pressing stop in the app, but the drone keeps trying to descend. At 5%, the override stops working entirely and the drone lands wherever it is.

Common Drone Landing Mistakes to Avoid

Throttling Down Continuously to the Ground

The most common beginner landing mistake. Continuous throttle-down gives the drone no stable hover phase and means you're actively fighting ground effect while simultaneously trying to place the drone precisely. The result is usually a diagonal drift and a stumble landing. The fix is the two-phase approach: descend to 2-3 feet, hover briefly, then cut.

Landing Without Checking Below and Behind

DJI drones don't have downward cameras that face toward objects you're approaching from altitude. You can fly directly over a person or obstacle that's not visible on your screen and not get a warning until your drone is 3 feet from it. Before any landing approach, check the area below and behind the drone visually, not just on the app.

Powering Off Motors Before the Drone Stops Moving

After a hard landing or a tip onto the side, new pilots immediately kill motors with the emergency stop command. If the props are still spinning fast and the drone is on its side, the props will chew into the ground or any surface nearby for the 1-2 seconds it takes to spin down. The correct sequence: land (or get to a safe surface), then cut throttle, then wait for motors to stop, then pick up the drone.

A landing pad costs $20 and prevents roughly 80% of landing-related damage. It's the cheapest insurance in your kit.

The Post-Landing Disarm Sequence

After touchdown, new pilots often grab the drone immediately or power it off without waiting. The correct post-landing sequence:

  1. Confirm the drone is stable on the ground with no drift or rocking.
  2. Hold the throttle stick fully down for 3 seconds to trigger the CSC (Combination Stick Command) motor stop. You'll hear the motors spin down.
  3. Power off the drone using the button. Wait for the LED indicators to go dark.
  4. Remove the battery before picking up the drone to handle it.

Powering off before motors have fully stopped puts stress on the ESCs and can cause motor wear over time. It also risks a prop spinning up briefly as power cuts, particularly on older firmware.

Not Setting RTH Altitude Before Flight

The default RTH altitude on DJI drones is 30 meters (about 100 feet). That's fine in open spaces but will fly directly into a tree if your home point is in a park with 40-meter oaks. Set RTH altitude before every flight based on the actual terrain between you and your home point. It takes 10 seconds in the Safety menu and prevents one of the most frustrating and entirely preventable flyaways.

FAQ

Bring the drone to a hover at 2-3 feet above your landing spot, then reduce throttle until you're about 6 inches off the ground, then cut throttle completely. The drone drops the remaining few inches onto its legs. Don't try to fly it all the way to the ground smoothly: that fighting with ground effect makes landings less stable, not more.

First disable the downward vision sensors in DJI Fly's Safety settings, otherwise the drone will climb away from your hand. Hover the drone at chest height (5-6 feet), approach from behind so props face away, and grip the body from below. Cut throttle once you have a firm grip and wait for motors to stop. Never grab from above or beside spinning props.

Precision landing uses the drone's downward camera to visually identify the takeoff location and land within centimeters of it. When the drone descends to within about 5 meters of the GPS home point, it switches from GPS to visual positioning for the final approach. It works best on visually distinctive surfaces like a landing pad. On uniform surfaces like blank grass, it falls back to standard GPS accuracy (2-5 meters).

RTH triggers when you press the RTH button, lose signal, or the battery drops to a critical level (typically 10-15%). The drone climbs to its preset RTH altitude, flies back to the recorded home point using GPS, and auto-lands. Standard RTH places the drone within 2-5 meters of takeoff. Precision landing (if available and the surface is visually distinct) improves this to within a few centimeters.

Point the drone into the wind so you have a headwind rather than a crosswind during descent. Descend slightly faster than you would in calm conditions to spend less time in the turbulent ground effect zone. When you're 6 inches up, cut throttle, just as you would in calm conditions. Don't try to gently fly it onto the ground: the constant small corrections needed in wind make a controlled drop from 6 inches more reliable.

Your best options are: use a portable landing pad to create a flat surface, hand-catch the drone, or hold the body from below while cutting throttle to stabilize the landing. Avoid landing on slopes directly: the drone can tip onto its side with props still spinning, causing a prop strike. If none of these options work, walk 30 seconds to find a flat spot.

If signal is lost during a descent, the drone's failsafe activates. Most DJI drones are set to hover briefly, then trigger RTH. If the drone is already close to the ground during a manual landing approach, it may continue descending to land where it is. Check your failsafe settings in DJI Fly before flying: you can set the response to Hover, Return to Home, or Land.

Yes. A landing pad protects the camera and gimbal from dust, sand, and debris kicked up by rotor wash, prevents small rocks from damaging props, and gives you a flat, visually distinctive surface for precision landing. The PGYTECH O-Ring Pro is the most popular option and fits in a jacket pocket. At $20-30, it's among the cheapest ways to protect a $500+ drone.

Paul Posea

Paul Posea

Author · Dronesgator

Paul Posea is the founder of Dronesgator and has been reviewing and comparing drones since 2015. With a Part 107 certification, 195 YouTube drone reviews, and published work on Digital Photography School, he combines hands-on flight testing with data-driven analysis to help pilots find the right drone.